Showing posts with label Brandy Everette. Show all posts

Saturday, July 25, 2009

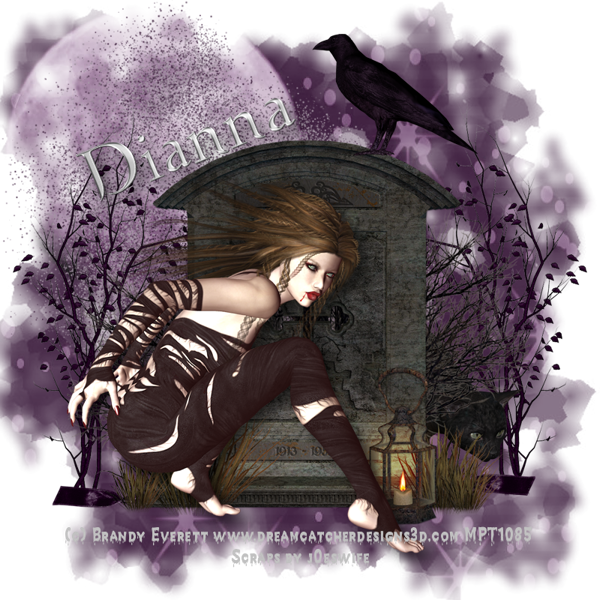
Predator Tutorial

Majestic Midnight


This tutorial was written by Dianna Richards of Digicats (and Dogs). Any resemblance to any other tutorial, published or unpublished, living, dead or undead, is purely coincidental.

Please do not rebroadcast, redistribute or otherwise claim this tutorial or any part there of as your own work.


Items you will need to complete this project:

The Majestic Midnight taggers kit by Scraps by j0eswife. This kit is available for purchase at Digital Chaos and Stargazer Scraps.

Tube of choice. I am using psp8383 SCEverett Predatory by Brandy Everett. You must have a license to use this tube. Note that Brandy is no longer selling out of MyPSPTubes.

Wee Scots Mask #228 which you can download HERE.

Font of choice.

The Silver Twilight Alpha, which was created by Amber Gray and which may be downloaded from her blog HERE.


Note that H# and V# refer to Horizontal and vertical coordinates on your canvas grid. Make sure you have View, Rulers checked in order to see the ruler grid.

When I say "Add to your canvas" I expect that you will copy and paste it as a new layer, unless otherwise state in the tutorial.

This tutorial assumes you have a working knowledge of PSP. It was written using PSP X1, but should work in PSP 8 and up.

To begin, open a new raster canvas, 800 x 800 pxls, flood fill white.

Open SBJ_Paper 26, and resize to 80%. Select --> Layers --> Load/Save Mask --> Load Mask from Disk and locate Wee Scots Lass mask # 228. Make sure the "fit to canvas" box is checked, then click on load.

Using you pick tool, expand to the guidelines on the mask to the edges of the canvas.

Select --> Layers --> Merge --> Merge group. then add to your main canvas, centered.

Open Vine #3, resize to 60% and add to canvas, centered at V600, H400. Duplicate and Mirror.

Open Tombstone and Lantern, resize by 75% and add to canvas centered at V400, H450.

Open psp8383 SCEverett Predatory, click on the tube layer, copy and past to your main canvas, centered at H330, V490.

on the layers pallet, click on Vine #3 (raster 2) to activate it. Open SBJ_Black Cat, resize to 50% and copy to main canvas, centered at H550, V550. (This should result in the cat peaking out from behind the tombstone as shown.)

Open Ribbon with Rings 3, resize by 75% and add to your canvas centered at H400, V650. Using your eraser tool, erase any of the branches on the either of the vines that might be showing below the ribbon.

On the layer pallet, move "copy of Raster 2" down so that it's directly above "Raster 2" and below the cat and ribbon layers. Then click on the tube layer (Raster 4) to activate it.

Open Raven 2, resize to 50% and add to the canvas, centered at H530, V130.

Open Glitter Smudge 2, and resize to 75%. On the layers pallet, click on the paper layer (Raster 1) to active it and add the glitter smudge, centered at H300, V300.

Activate your tube layer and add a drop shadow. I am using Offsets of V & H, 10, Opacity of 60, blur of 25.

On the materals pallet, set your foreground color to transparent and your background color to #c0c0c0 (gray). Using the font of choice add the copyright info to your tag. For the Predatory tube, the copyright info should be:

(c) Brandy Everett www.dreamcatcherdesigns3d.com YOUR MPT LICENSE NUMBER

I am using the font "Creepy", 8 points, bold and centered and then I used my pick tool to adjust it further.

You can now save your artists' copy as a .pspimage.

Adding your name is usually a personal preference. I am using the Silver Twilight alpha that was created by Amber Gray Designs, which is a FTU alpha.

To add the name using this alpha, open a new raster canvas, 600 x 300 pxls, with a transparent background. The Silver Twilight Alpha is a full sized alpha that I resized for tagging purposes, You my script it down before you start this, or you may manually resize the letters to fit the canvas as you go along, which ever you prefer.

Open the capital letter of choice, resize accordingly and add to the new canvas on the far left hand size.

Repeat with the lower case letters to spell out the name you desire. You may need to play with the size of the letters to get them to fit on the canvas, depending upon the length of the name.

Once you have the name composed to your taste, select Layers --> Merge --> Merge Visible. Make sure the top layer on your layer pallet is selected, then copy and paste the name as a whole to your main canvas. Use your pick tool to resize the name to fit, and center it around H250, V200 (depending upon the length of your name).

Rotate slightly counterclockwise to taste, and add a drop shadow to match the one you added to the tube.

Resize your canvas by 75% (to 600 x 600 pxls). Drop the white background layer, merge visible, and save the file as a .png as your all done!

That's it! I hope you enjoyed this tutorial. If you should have a problem, please feel free to E-Mail Me and I'll be happy to help you out.

Saturday, May 30, 2009

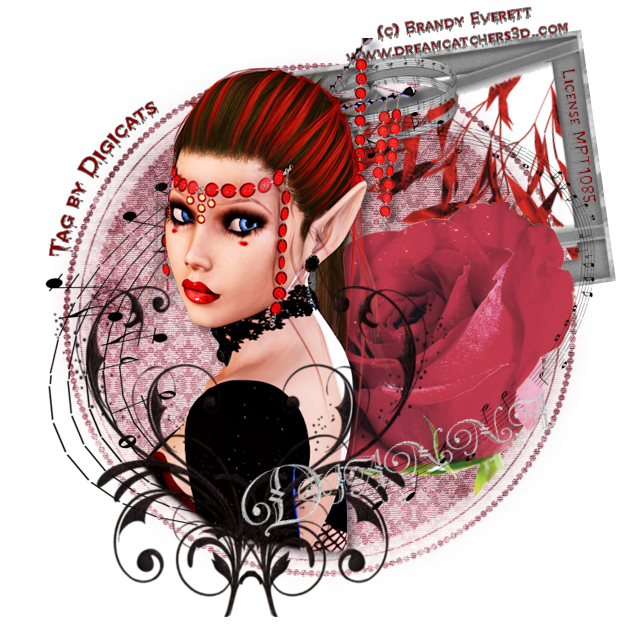
Lullaby of Love Tutorial

Lullaby of Love


This tutorial was written by Dianna Richards of Digicats (and Dogs). Any resemblance to any other tutorial, published or unpublished, living, dead or undead, is purely coincidental.

Please do not rebroadcast, redistribute or otherwise claim this tutorial or any part there of as your own work.


Items you will need to complete this project:

Play me a Lullaby taggers' kit by Heartbeatz Creationz. You can purchase this kit at the Heartbeat Creationz Boutique.

Tube of choice. I am using Brandy Everett's "Look of Love" which was purchased and licensed through MyPSPTube.com. Since I purchased the tube, Brandy has left MyPSPTube.com. I do not know where she is licensing her artwork at the current time.

Wee Scot's Lass mask # 52, which you can download HERE.

Gothic font of choice. I am using Chiller, which is a Windows System font.

Optional alpha of choice. I am using "Diamond" which was created by JoBeth.


Note that H# and V# refer to Horizontal and vertical coordinates on your canvas grid. Make sure you have View, Rulers checked in order to see the ruler grid.

When I say "Add to your canvas" I expect that you will copy and paste it as a new layer, unless otherwise state in the tutorial.

This tutorial assumes you have a working knowledge of PSP. It was written using PSP X1, but should work in most other versions of PSP.

To begin, open a new canvas, 800 x 800, flood fill white.

Open HC_pmal-paper5. Select Layers --$gt; Load/Save Mask --$gt; Load mask from disk and then select Wee Scots Lass Mask #52. Make sure the "Fit to Canvas" box is checked and then hit Load.

Select Layers --$gt; Merge Group. Then select Edit--$gt; Copy --$gt; Paste as new layer. You may now close HC-pmal-paper 5 (do not save it).

Select Image --$gt; Resize. Resize the canvas to 80%.

on the Pallet menu click on the add a new layer (Raster 2) but leave it blank for now.

Open HC_pmal-frame5. Using your magic wand, select and delete the white background areas of the frame.

Resize the frame by 60%, and add to canvas centered at H430, V180.

Open pso12055 SCEverett Look of Love. Select the Tube layer, copy and paste to your canvas, centered at H250, V300.

Using your eraser tool, remove the parts of the tube that fall outside the pink paper area.

Select HC_pmal-Element 40, resize 80% and add to your canvas centered at H250, V450.

On the layers palate, click on Raster 3, which is the frame layer to activate it.

Open HC_pmal-Element 26, re-size 80% and add to your canvas centered at H420, V380. Again, use your eraser tool to remove the part of the stem that fall outside the paper area.

Open HC_pmal-Element 46, resize 85%, and add to canvas. Since Raster 6 (the rose) will still be active, it will fall over the rose layer, but under the tube layer (Raster 4). Center at H320, V320.

Set your foreground color to Gray #808080, and your background color to Deep Red #800000. You can pick these directly off the color pallet boxes on the Material Properties pallet.

On the Layer Pallet, click on Raster 2 to activate. Open HC_pmal-Element 10, resize by 80% and add to canvas, centered at H440, V210. Use your eraser tool to remove anything that shows outside the frame.

Click on your text took and select Gothic font of choice. (I am using Chiller.) Font size with depend on font choice. Also select Bold, and Center.

On the Canvas, click over the frame and add the copyright information. Adjust and locate to taste. You can also add your "tag by" line at this time if you wish. Location is up to you, but leave the lower right hand corner of the tag open, as that is where we'll add the name.

Note that you must use your own licensing number when you add the copyright info, and it should be clearly visible along with the artists name in order to be compliant with the licensing agreement.

Add a drop shadow of choice to the tube layer.

Save the artist's copy as a .pspimage at this time.

You can either use an alpha to add your name or you can type it in using a suitable font. I am using the Diamond Alpha which is a full sized alpha that I have scripted down to use in tagging.

Usually, when I add names using alphas, a do a name plate up in a separate canvas, merge visible and then copy and paste the name over as one file. Feel free to add your name in whichever manner works best for you.

Select Layers --> Merge Visible. Save the image as a .jpg image and you're all ready to post it to the web.

I hope you enjoyed this tutorial. If you have any questions or get stuck, please feel free to E-Mail me.

Saturday, April 25, 2009

Gothic Twilight (Tutorial)

Twilight Gothic


This tutorial was written by Dianna Richards of Digicats (and Dogs). Any resemblance to any other tutorial, published or unpublished, living, dead or undead, is purely coincidental.

Please do not rebroadcast, redistribute or otherwise claim this tutorial or any part there of as your own work.


Items you will need to complete this project:

Heartbeatz Creationz Hide & Seek Twilight kit, which is available at the Heartbeatz Creationz Store, as well as other fine online boutiques.

Gothic tube of your choice. I am using Brandy Everette's Victorian Gothic. You need a license to use this tube, which may be purchased at MyPSP.com.

Wee Scot's Lass Mask # 222 which is available for download Here.

Moon #2 and the Fog Overlay from Dynamis Immortal's "Something Wicked" Taggers kit, which is available for download HERE.

The fonts referenced in this tutorial are available for download HERE.


This tutorial assumes you have a working knowledge of PSP. It was written using PSP x1, but should work in most versions of PSP.

To begin, open a canvas, 800 x 800 pxls, floodfill white.

Open Hide & Seek Twilight Paper #20 and add to canvas.

Select layers, load/save mask, load mask from disk and select Wee Scot's Lass mask #222 and load.

Select Layers, Merge, Merge Group.

Resize your canvas by 80% (640 pxls x 640 pxls).

Open PSP12058 Victorian Gothic and select the tube layer, copy and paste as a new image. Mirror the image, then copy and paste it to your canvas to the left the torn heart.

You can then dismiss the new image. You can also close PSP12058.

Open a new canvas, 600 x 600 pxl, flood fill black.

This time around, open Twilight Paper #13 and add to the canvas. Don't worry that it overruns the edges, it won't matter.

Select Moon02 from the Image Reflections kit and add to the new canvas.

Open the fog overlay from the Image Reflections kit, resize by 50% and add to the new canvas, directly over the moon.

Select, Layers, Merge, Merge visible.

Take your selection tool, preset, rectangle, replace, feather 2 and make sure the Anti-alias box is checked. Select the 300 x square fogged area.

Edit, Copy. You can then dismiss the window we were working in (you do not have to save the changes) and return to the main canvas.

Using the pick tool, click inside the heart cut out, which will, in effect, active the white under layer. Edit and Paste as a new layer the image of the fogged moon from your clipboard onto your canvas, then relocate it so that it shows through the heart cut out.

There will be a wee bit of overhang off to the right of the image. Take your little eraser tool and erase it.

On your layer palate, activate the top layer of the canvas again (the layer with the tube on it).

Returning to the twilight kit, select element #4 and copy & paste to your canvas, centered at 200 Horizontal, 430 Vertical on the canvas grid.

Open element #30, rotate right, and resize, 50%. Copy and paste to your canvas as new layer. Rotate the rose until it is more or less horizontal, then center at H200, V560 on the canvas grid.

Activate the tube layer, and using your eraser tool, erase the part of the tube that hangs below the rose's stem, which is a small part of the girl's thigh.

on the layer palate, activate the top layer again (the rose layer). Open element #19. Copy and paste to your canvas, centered at H500, V320, on the canvas grid.

Using your pick tool, rotate the image until the rose curls around the outside the torn heart area. You will probably need to scoot it over to the right about 20 pxls to get the correct effect.

Take your eraser tool and erase the rose stem below the rusty lock in the element. (I love that rusty lock, by the way Jay, that's just Brill!)

Open element #18, resize by 80% and add to your canvas, centered at H100 & V300.

Open element #9, resize by 50% and add to the canvas, centered at H80, V550.

Open element #8. Using a suitable Gothic type font, add your copyright into to the tag.
I am using Corps-Script, 12 points. Since I think Brandy's work is the bomb, use a nice legible shade of gray for the typing. I'm suing RBG 128 for the stroke and RBG 192 for the fill.

Once you've got everything written and all lined up and looking spiffy, merge visible, then resize by 50%.

Activating the masked layer on your layer pallet, add element #8 with the copyright info, centered at H 410, v 110. Rotate about 20% so that the copyright info is clear of any of the other elements surrounding it and is legible.

Select your tube layer and add a drop shadow to taste. I am using Offset V5, H6, Opacity 44, Blur 10, Color Black.

Save your artist's copy as a .psp file.

Using a suitable Gothy type font (I am using Cup and Talon) add the desired name to the tag. You may choose whatever locate you wish. I am centering at H450, V550. Colors are up to you, I amusing a dark red glitter for the stroke and black glitter for the fill. (Note that the font size will likely depend on the size of the name you need to add, so I'll leave that decision to you.)

On the Layers pallet, select the white under layer and delete.

Select Layers, Merge, Merge Visible, and the save the file as a .png file.

Since you previously saved the artist's copy, you can then reopen that copy and change the name, repeating the last three steps, to suite your fancy as many times as you want or for as many time as the siggy piggies bug you for.

You may wish to resize the finished tag by 85% for use on message forums and the like.