This tutorial was written by Dianna Richards of Digicats (and Dogs). Any resemblance to any other tutorial, published or unpublished, living, dead or undead, is purely coincidental.
Please do not rebroadcast, redistribute or otherwise claim this tutorial or any part there of as your own work.
Items you will need to complete this project:
The Whimsy Butterfly Garden by Gemini Creationz. This kit may be purchased at Sophisti-Scraps.
Tube of choice. I am using the Seasonal Fae Cookie posers by Sophisticated Scraps and Images.
Wee Scots Lass masks #235 & #245, which you can download HERE.
Shel Belle's FTU Summer Sun alpha, which may be downloaded from her blog. This is a full sized alpha, I have scripted it down to use for tagging.
Note that H# and V# refer to Horizontal and vertical coordinates on your canvas grid. Make sure you have View, Rulers checked in order to see the ruler grid.
When I say "Add to your canvas" I expect that you will copy and paste it as a new layer, unless otherwise state in the tutorial.
This tutorial assumes you have a working knowledge of PSP. It was written using PSP X1, but should work in most other versions of PSP.
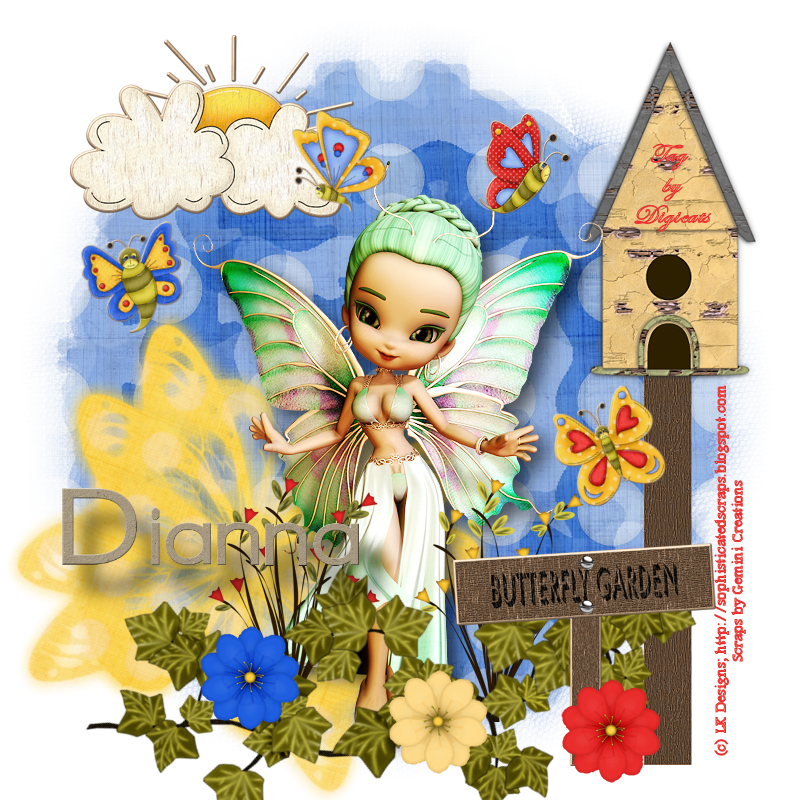
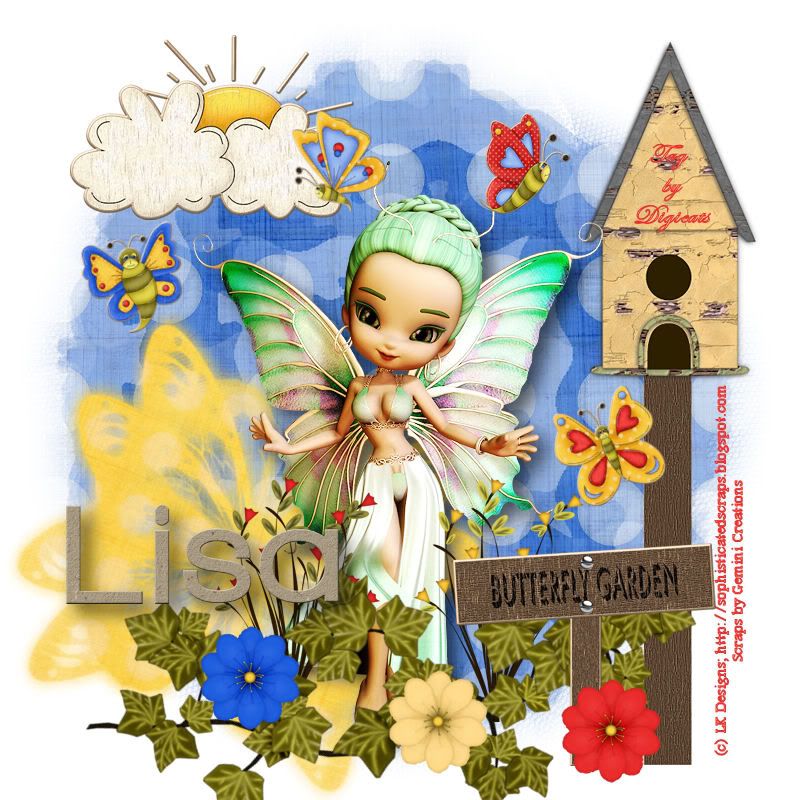
To begin, open a new canvas, 800 x 800 pxls, Flood fill white.
Open WBG Paper-3. Select Layers --< Load/Save Mask --< Load Mask from Disk and find WSL Mask 235. Make sure the "Fit to canvas" box is checked and then click on "Load".
Layers --< Merge --< Merge Group, then copy and paste Paper 3 to the main canvas, centered.
Open WBG Paper-1. Select Layers --< Load/Save Mask --< Load Mask from Disk and find WSL Mask 245. Make sure the "Fit to canvas" box is checked and then click on "Load".
Layers --< Merge --< Merge Group, resize to 60%, then copy and paste Paper 3 to the main canvas, centered at H250, V550. Use your pick tool to rotate the paper about 30 degrees clockwise.
Open Birdhouse 1, resize to 80% and copy and paste to the main canvas, centered at V670, H400.
Open Tube of choice. I am using Sophisticated Scraps Seasonal Faes - Spring 2. Copy and paste to canvas centered at V400, H450.
Open Grass Flowers, and resize to 35%. Add to your canvas centered at H300, V600.
Repeat with TallGrassFlowers, but center on the canvas at H500, V600.
On your layers pallet, click on the blue paper layer to activate. Open Sunclouds1, resize to 65% and add to your canvas, centered at H220, V130.
On your layers pallet, click on the TallGrassFlowers to active. Open Ivy 1, resize to 75%, and add you your canvas centered at H400, V600. Using your pick tool, rotate the ivy about 30 degrees clockwise, then relocate the vertical center to 650. This should put the ivy down along the bottom of the tag.
Open WBG Sign, resize to 65% and add to canvas, centered at H580, V650.
Open Flowers of choice, 1 through 6, resize 25% each and place at random along the ivy at the bottom of the tag.
Open Butterflies of choice 1 through 5, resize 25% and place at random in the air around the Fae at the top of the tag.
Add a drop shadow of choice to your Fae. I am using Offsets of Vertical & Horizontal 10 each, Opacity 60, Blur 25.
Select Image, rotate right. On the (now bottom) part of the tag, next to the birdhouse post enter the copyright information for the tag.
For the Seasonal Fae, the copyright info is:
(c) LK Designs; http://sophisticatedscraps.blogspot.com
You may add the Scrap Designer information (Gemini Creationz) and the tagged by information as well.
I using a foreground color of Red #ea3130, and a background info of muted yellow #f8d189, and am using the font Footlight MT Light, Bolded and Centered.
Select Image, rotate left.
You may now save the artist's copy as a .pspimage.
For the name, I am using the Summer Sun Alpha by Shel Belle, which is an optional full sized alpha that I have scripted down for tagging. You may add your name as you wish.
For the purposes of this tutorial, I am locating the name on the left hand side of the tag, centered at H200, V550. Your mileage may vary. I have also added a drop shadow to the name, again, that is a personal preference.
Select Image, resize, make sure the resize all layers box is checked and resize the tag 75% (600 pxls by 600 pxls). You may then either drop the white background, merge visible and save as a .png file, or leave the white background in place and save as a .jpg file. Either way is acceptable.
That's it! I hope you enjoyed this tutorial. If you have any questions or get stuck, please feel free to E-Mail me.
Optional JPG file with white background:
No comments:
Post a Comment