This tutorial was written by Dianna Richards of Digicats (and Dogs). Any resemblance to any other tutorial, published or unpublished, living, dead or undead, is purely coincidental.
Please do not rebroadcast, redistribute or otherwise claim this tutorial or any part there of as your own work.
Items you will need to complete this project:
The new Oriental taggers kit by Aquarius Designs. This kit is available for purchase at Sophisti-Scraps.
Oriental tube of choice. I am using Anayumi by Lacy Clagg which can be purchased at the Lacy Clagg tube store.
(Note that Linda includes a number of "Dolls" in the kit, so you may use one of those if you'd like.)
Your name in Chinese Symbols which you can find at www.chinesenames.org. Once you find you name - or some variation there of - be sure to save the symbols.
Wee Scots Lass mask #238, which you can download HERE.
Font of choice.
Note that H# and V# refer to Horizontal and vertical coordinates on your canvas grid. Make sure you have View, Rulers checked in order to see the ruler grid.
When I say "Add to your canvas" I expect that you will copy and paste it as a new layer, unless otherwise state in the tutorial.
This tutorial assumes you have a working knowledge of PSP. It was written using PSP X1, but should work in PSP 8 and up.
To begin, open a new layer raster layer, 800 x 800 pxls, flood filled white.
Open Paper 20, resize to 80% and add to canvas.
Open Paper 15, resize to 80%. Select --> Layers --> Add/Save Mask --> Load Mask from Disk and locate Wee Scots Lass Mask # 238. Make sure the "fit to canvas" box is checked and click on load.
Activate you selection tool, and drag the guidelines for the mask out to the ends of the canvas. Then go to Layers --> Merge --> Merge group, then copy and paste the masked paper to your canvas, centered.
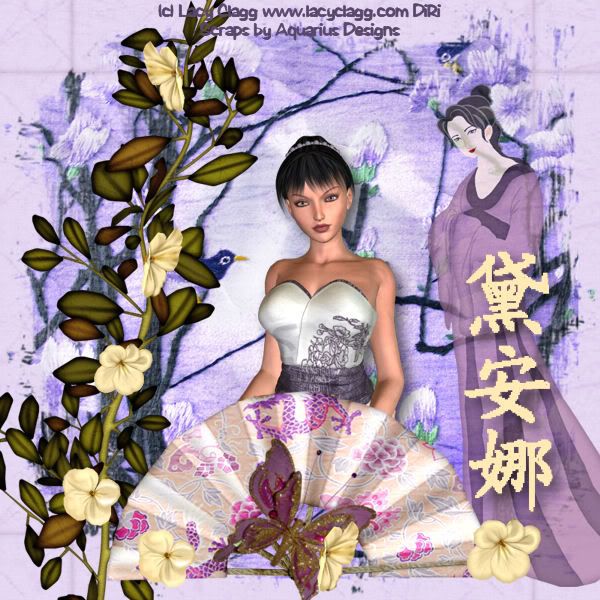
Open Geisha 1, and add to canvas, centered at H750, V450. (Yes, so of the geisha's robes will flow off the canvas. This is fine.) On the layers pallet, set the opacity to 75%.
Open Leaves 3 (don't resize) and add to canvas centered at H150, V400.
Open tube - I am using Anayumi4 by Lacy Clagg. If necessary select the tube later, then copy and paste to canvas. Center at H400, V450.
Open Oriental Fan 2, and add to canvas, centered at H400, V600.
Open Flowers 1, 2 and 2 and sprinkle along the branches and along the bottom of the tag to choice, resize as necessary.
Open Butterfly 1, and resize 50% and add to canvas, centered at H400, v700. Using your pick tool, rotate the butterfly 20 to 30 degrees clockwise on the canvas.
Set your foreground and background colors to #58466b. Using your font of choice, add the copyright and licensing information for you tube to the top of the tag, centered at around H400, V30.
Save your artist's copy as a .pspimage.
Open "Your name in Chinese", which you should have saved from the above referenced website earlier. Resize to 200%, then using you select tool, select the Chinese characters, copy and paste as a new image. Select Adjust --> Hue & Saturation --> Colorize. You can use the factory presets. I used a red neutral color.
Using your magic wand, select the background color. Made sure you pick up the areas inside the characters as well. Invert selection. Copy and paste as a new image.
Set you foreground color to #ffe9b4 and using your floodfill tool, colorize the letters.
You might need to use your paintbrush tool to clean it up some, this will also eliminate some of the pixelizing from the resize.
Using you selection tool, select the first character and add to your canvas over the geisha, just below her elbow. Repeat - with the characters flowing vertically with the rest of the characters. Resize as necessary.
Add a drop shadow to your tube and to the Chinese symbols. I am using offsets of H10, V20, opacity of 60, blur of 25, color black.
Resize the canvas to 75% (600 x 600 pxls). Select layers --> merge --> merge all, and save your tag as a .jpg file, and your all done!
I hope you enjoyed this tutorial. If you have any questions or get stuck, please feel free to E-Mail me.
No comments:
Post a Comment